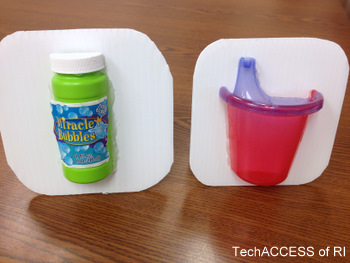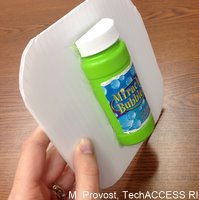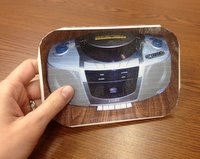
A good object symbol communication system will utilize object symbols that:
- Present high visual contrast between the backing and the object
- Incorporate auditory input and texture whenever possible
- Are markedly unique (in color, texture, and sound) when compared with the other object symbols in the set
- Are durable, both in terms of backing material and method used to affix object symbols to the backing.
Materials Needed:
Corrugated Plastic: This low cost item is the most durable and lightweight
backing material we have found. It can be found online, at home supply stores, sign shops, or material supply stores. It is available in multiple colors and comes in 4’ X 8’ or 18” X 24” sheets. We recommend purchasing 12 sheets in the smaller size, as it is easier to store and will give you a good supply.
Gorilla Glue: This extremely strong adhesive can be found in most hardware and craft stores. Substitutes will not perform as well. You will need to wet both surfaces of the materials to be bonded with a damp cloth, as water activates the adhesive. The glue expands as it cures, so use it sparingly. Avoid getting this on your skin. It does not come off easily. Follow the manufacturer’s instructions.
Hot Glue Gun: A hot glue gun is useful when attaching small items (such as bells for auditory input) to your object symbols. Do not use it as your primary adhesive, however. While hot glue does provide a relatively strong bond, we have seen it fail consistently when used to attach larger objects. Four dabs on the back of the finished symbol provide a good non-skid measure.
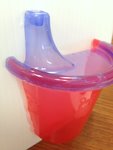
Objects: High visual contrast between the object and backing is important.  The objects chosen should represent their referent items/activities as closely as possible. For small objects (e.g. cups, spoons, small toys such as rattles, etc.), it is best to use a duplicate of the actual item. When possible, these objects should be cut in half before gluing them to the backing. This is a step toward higher levels of symbolic representation and also reinforces the distinction between the object symbol and the actual item/activity.
For larger items/activities, it is important to note that miniature objects should not be used (e.g., miniature plastic food to represent actual food items, or a small toy bicycle to represent a full-sized bicycle). Miniature representations are too abstract. Textures, sounds, and objects associated with the activity are more appropriate. For example, when representing a bicycle, a good choice would be to use a duplicate hand grip, as the grip (along with the pedals and seat) is a primary tactile experience when riding a bicycle. This example is particularly true for individuals with visual impairments. Other examples include using a small length of the same type of chain/rope used to hang a swing, or using a length of seatbelt and/or buckle to represent bus/car.
You will also need:
- Utility knife
- Scissors
- Ruler/straight edge
- Pen or pencil for marking
Construction:
1) Begin by cutting the backing material to size with the utility knife, using the straight edge as a guide. Size is determined by your user’s abilities. 5” X 5” is a good starting point. It is a good idea to keep all symbols in the set uniform in size. Be sure to use the scissors to round off the corners.
2) For objects that need to be cut in half, you may be able to access your school’s maintenance department for help. Some items can be cut with a utility knife. Whatever method you use, be safe. If you aren’t able to complete this step, glue the whole object as an intermediate step while you are finding help. It’s better to have an object symbol that might not be perfect than it is to have no symbol at all.
3) Glue the object to the backing using the Gorilla Glue. The glue will fully cure in 24 hours, so plan to make your symbols at least a day before you’ll need them. The adhesive used in Velcro usually fails after a short time, so you can use Gorilla Glue to strengthen that connection as well.
4) Incorporate unique auditory and tactile features into your symbols whenever possible. This will help your user distinguish the symbols within the set. Examples of auditory features include using small bells or a shaker on a “music” symbol, a squeaky bath toy for “bath”, etc. Examples of tactile features include using fabric paint to enhance a symbol, gluing different textures such as sand or glitter when appropriate. The idea is incorporate as many sensory modalities as possible into your symbols.
Final thoughts:
It may seem inconvenient to collect these unique materials. It will be time saved in the long run, as you will have to create symbols over and over if they are not durable. This results in more work for you, and lost communication opportunities for your user. By gathering the right supplies initially, you’ll be prepared to make excellent object symbols for future students/users, and perhaps for use as schedule symbols for your classroom, among other uses.
Good objects are hard to find. They’re most often found incidentally. When you’re out shopping, keep your eyes open for potential object symbol items. Watch for ideas to incorporate auditory and tactile features as well. The longer you’re at it, the better your symbols will become.


M. Provost TechACCESS of Rhode Island (C)


